

#
Creating Animation Curves
While keyframes define the start and end points of an animation, the animation curve (or "interpolation curve") defines how a clip moves from the start to the end. You may have also heard this referred to as the amount of "easing".
Final Cut gives you just two premade interpolation modes - "linear" or "smooth":
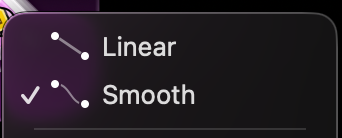
These two modes offer little customization, and not all parameters even support them both. For example, the scale parameter is limited to linear interpolation; you can't make it smooth at all!
#
Animation in Curves
Curves uses fully continuous sliders instead of rigid premade modes, giving you almost unlimited ways to customize your animations. Giving you as much control as possible over the animation curve was so important to me when designing Curves that I named the entire plugin after it!
With Curves, controlling the amount of easing is as simple as adjusting a slider:
Use the shape selector to pick from one of 7 curve shapes.

Use the graph view to visualize how your animation will move over time.

Use the parameter settings to dial in the exact curve you want.

#
What is a curve graph?
An interpolation curve defines the path from the start keyframe to the end keyframe. In Curves, we represent these with graphs. The bottom left of the graph represents the start keyframe, and the upper right represents the end keyframe.


Time moves from left to right. As we move further along the curve, we get closer to the end position and further from the start position. At a given point in time, the height of the curve tells us how close we are to either point.
#
Curve Shapes
There are 7 curve shapes to select from, each with their own parameters.


#
Linear
The simplest kind of animation is Linear. It just moves from point A to B in a straight line. There are no parameters to adjust.
#
Smooth
Smooth gives you a symmetric curve with a customizable amount of easing and backing. You may have heard this referred to as "ease both" in other animation systems.

Easing refers to how "sharp" the curve is. No easing is the same as linear, and lots of easing is a very quick jump from A to B in the middle of the two keyframes.
Backing slides the clip back before starting the animation. It gives it a cartoonish "bouncy" feeling.
#
Acceleration / Deceleration
Acceleration and Deceleration offer continuously increasing and decreasing speed curves respectively. You may have heard these referred to as "ease in" or "ease out". Just like Smooth, you can control the easing and backing.
#
Overshoot
Overshoot models springy / elastic things.

Mathematically, the Overshoot equation models the underdamped unit step response to a second order linear differential equation with constant coefficients, with an extra polynomial at the front to make the animation look even better. I did the calculus to make sure that no matter how you adjust the sliders, the equation is always continuous and differentiable everywhere, which means there are no "wrong answers"- the animation will look good no matter what settings you apply.
Bounciness lets you control the oscillation frequency as the overshoot settles to a steady state. Intro Time controls how much "lead in" is applied. This can be used to slow down the animation to make it more subtle. Acceleration controls how sharp the lead in curve is. Larger values give the animation more power.
#
Bounce
Bounce models bouncy things.

Mathematically, the Bounce equation is a geometric progression of parabolas, where the coefficient of restitution ("bounciness") is used as the geometric ratio. Each parabola is both geometrically shorter and thinner than the previous one. The progression is normalized to always fit perfectly between your start and end keyframe.
# Bounces lets you specify how many bounces should occur. Bounciness controls the coefficient of restitution- how bouncy is this object?
The bounce curve is drawn upside down from the others simply because it looked wrong if the start was at the bottom instead of the top.
#
Custom
Custom gives you Bezier handles letting you fully control the shape of the curve. Click and drag a handle to move it around. Use the zoom buttons (+/-) to zoom in and out.
